Office 365 Advanced Threat Protection, Anti-Phishing Policy (Add CRA Domains)
Print
Modified on: Thu, 30 Jun, 2022 at 12:13 AM
- Logon to your Office 365 Security and Compliance portal.
- Click on the Threat Management [1] dropdown, then Policy [2] and finally click the Anti-Phishing [3] link under Policies (as below).

- Click on the Office 365 AntiPhish Default (Default) Rule

- On the following screen, click on Edit Protection Settings as below:

- Click on Manage 0 trusted sender(s) and domain(s)

Note: There may be previously added senders or domains for your organisation, which would mean that the above link would not show a zero (0) value.
Here you can add trusted / known email addresses and domains.
This will allow you to override the anti-phishing policy for added domains only.
- On the screen that follows the Sender tab will initially be highlighted. Ignore that and click on the Domain tab as below:
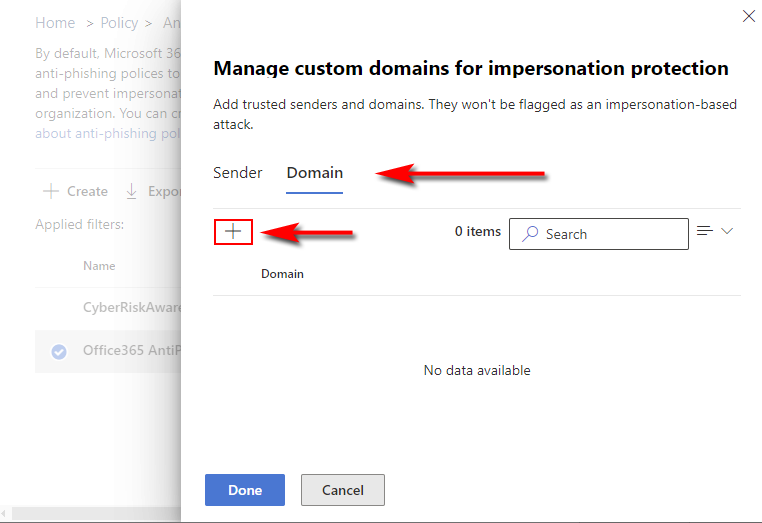
- Click the plus icon and we will then add each of the following domains listed below:
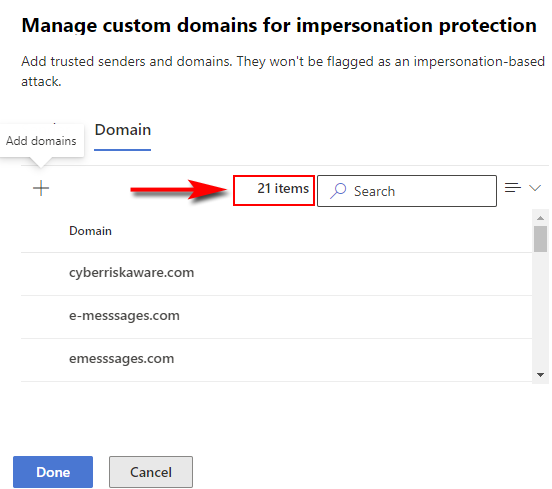
- When you click the plus icon, you will see the following screen. Enter the name of each domain one by one [1], and as you enter the domains they should appear as a clickable item [2] once they’re valid.
Click on the domain name(s) [2] to then add as below:

- Do not hit the Add Domains button until all the domains are added:

- When all 21 domains have been added, click on the Add domains button.
You will see a list of domains as below:
- Please ensure that you’ve added all the domains correctly. Click the Done button.
- You will then see that you’ve added the 21 domains, as below:

- Finally, click Save.
Did you find it helpful?
Yes
No
Send feedback Sorry we couldn't be helpful. Help us improve this article with your feedback.